ROUND BALER GUIDE · NET WRAP PROBLEMS · DIAGNOSIS · REPAIR · AMERICA EVER-POWER
Round Baler Net Wrap Problems —
Causes, Diagnosis, and Fixes for the Most Common Issues
Net wrap problems — wrap not feeding, wrap not cutting, wrap coming loose on the bale, or the baler stopping mid-wrap cycle — account for a significant share of in-field round baler downtime on net-wrap-equipped models. Most net wrap problems have a specific root cause that, once identified, is repaired in 5 to 20 minutes. This guide maps every common net wrap failure mode to its root cause and the correct field fix.
Round Baler
Troubleshooting
AMERICA EVER-POWER · DALLAS TX PARTS DEPOT · 3-DAY DELIVERY US & CANADA
QUICK REFERENCE · NET WRAP FAILURE MODES AND TYPICAL CAUSES
WRAP NOT STARTING
Feed roller not engaging
Most common cause: wrap leading edge not correctly positioned under feed roller. Also: bale sensor not signaling full bale (sensor failure or calibration drift).
WRAP NOT CUTTING
Cutter blade dull or jammed
The net wrap cutter blade dulls after 5,000–10,000 bales. A blade that crushes rather than cuts the net leaves a long tail that wraps around the pickup on the next pass.
WRAP COMING LOOSE
Insufficient wrap layers
Bale surface tension too low — wrap layers insufficient for crop density, or bale ejected before full wrap cycle completes. Check layer count setting and bale sensor timing.
WRAP TEARING IN CHAMBER
Wrong net wrap spec
Net wrap width does not match bale width, or net tensile strength is below the bale density’s pull requirement. Confirm net wrap spec matches baler model specification.
How the Net Wrap System Works — Understanding Before Diagnosing
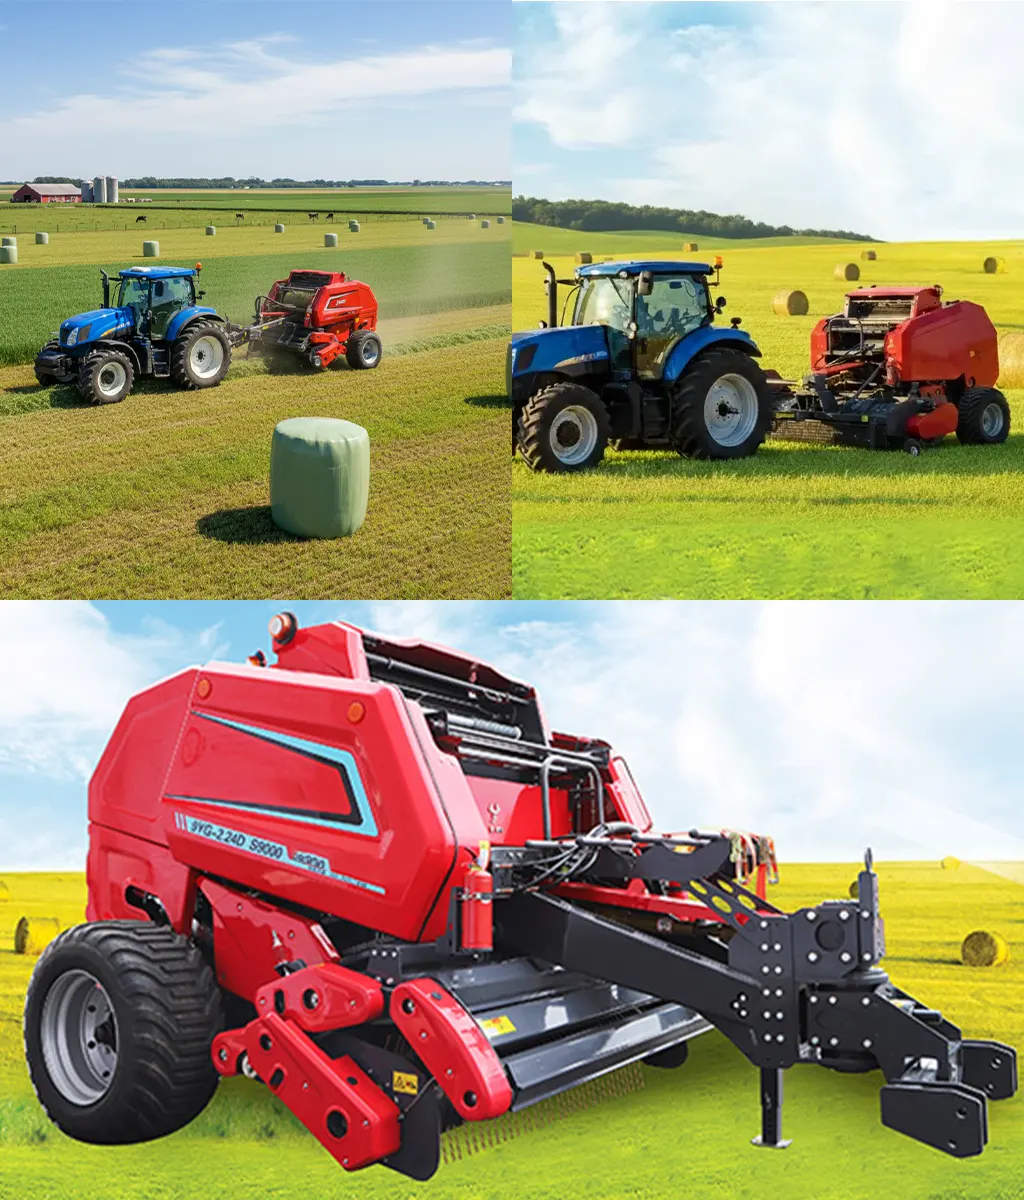
The net wrap system on the 9YG-1.5N and 9YG-2.24D S9000 Ultra round balers operates in a 5-step cycle that begins when the bale density sensor signals that the bale has reached the target diameter. The cycle is: (1) the feed roller engages and begins drawing net wrap from the roll through the feed path; (2) the net enters the bale chamber at the bottom of the bale and is carried up and around by the rotating bale surface; (3) the layer counter tracks wrap revolutions until the specified number of layers is complete; (4) the cutter blade swings to sever the net at the completion of the wrap cycle; (5) the tail of the net from the severed edge is tucked under the last layer by the bale rotation and the wrapped bale is ejected.
Each step in this cycle has its own failure mode, and correctly identifying which step failed is the first diagnostic task when the operator discovers a wrap problem. A bale that ejects without any net on it failed at step 1 or 2 (net never entered the chamber). A bale with net hanging in a long untethered tail failed at step 4 (cutter did not fire or fired incorrectly). A bale with net that pulls off easily when the bale is handled failed at step 3 (insufficient layers). A net that tears transversely during wrapping failed at step 2 or the net feed path (wrong tension or obstruction in the path). Identifying the specific step failure directs the operator to the specific component inspection that reveals the root cause — eliminating the trial-and-error troubleshooting that wastes 30 to 60 minutes on an in-field problem.
Net Wrap Not Feeding — Diagnosis and Fix
A net wrap system that does not feed — the bale reaches full size and the wrap cycle is triggered but no net enters the chamber — has one of four root causes that should be checked in order of most-to-least common.
Cause 1 — Net Leading Edge Not Under Feed Roller (Most Common)
After a net roll change, the operator must position the net leading edge precisely under the feed roller — not just inserted into the feed slot but seated under the roller nip point with enough material protruding on the chamber side to be caught by the bale surface rotation. If the net edge is inserted past the nip point but the material on the chamber side is less than 2 to 3 inches, the rotating bale surface may not catch the net edge on the first wrap trigger. Fix: Open the access panel, rethread the net so 4 to 6 inches extend past the feed roller into the chamber side, and close the panel before the next bale.
Cause 2 — Bale Size Sensor Not Triggering
The bale diameter sensor — an arm or roller that contacts the outer surface of the forming bale and pivots to signal when the target diameter is reached — can fail to trigger the wrap cycle if the arm pivot is corroded and stiff, if the sensor position is set to a larger diameter than the bale is actually reaching, or if the electronic sensor (on electronically controlled models) has a loose connection. Fix: Clean and lubricate the sensor pivot. Verify the diameter setting is correct for the crop density. On electronic models, check the sensor wiring connector for corrosion.
Cause 3 — Feed Roller Drive Not Engaging
The feed roller is driven by a clutch mechanism that engages when the bale sensor triggers. If the clutch mechanism has a worn pawl, a broken clutch spring, or a cam that has been damaged by debris impact, the feed roller will not turn when triggered. Fix: Manually cycle the clutch mechanism to verify engagement. Inspect the clutch components with the drive cover removed — a broken spring or pawl is visually identifiable. Replace the damaged component from the net wrap drive repair kit stocked at the Dallas depot.
Cause 4 — Net Roll Empty or Wrong Width
Net wrap rolls that run out mid-session prevent the system from feeding. Net wrap of the wrong width — narrower than the bale width — will start feeding but fail to cover the bale ends, leaving exposed bale surface. Always check net roll remaining supply at the session-start checklist. Fix: Replace the roll. Confirm the replacement roll width matches the bale width specification in the baler operator manual.
Net Wrap Not Cutting — Cutter Blade and Severing Arm Problems
The net wrap cutter blade is a high-cycle wear item that dulls progressively with use. A sharp cutter blade severs the polyethylene net with a single clean impact — the net snaps at the blade contact point and the tail end is tucked neatly under the last wrap layer as the bale completes its final rotation. A dull cutter blade stretches the net rather than severing it cleanly, leaving a 12 to 24 inch tail of unsevered net hanging from the ejected bale. This tail wraps around the pickup tine shaft on the next pass and causes the first-order secondary failure that follows net wrap cutting problems — a net tail caught in the pickup that must be removed by hand before baling can resume.
The cutter blade replacement interval is typically 5,000 to 10,000 bales — at which point the blade edge has rounded enough to produce stretched rather than clean cuts consistently. The field diagnostic for a dull cutter blade is exactly the long-tail symptom described above: bales ejecting with a net tail longer than 6 inches that is unsevered rather than tucked. A cutter blade that fires but does not penetrate the net — leaving the net completely intact rather than partially stretched — may have a misaligned cutter arm that is not bringing the blade into contact with the net at the correct travel point. Check the cutter arm travel endpoint against the operator manual specification — the arm should bring the blade to within 2 to 4 mm of the net contact surface at full travel. Replacement cutter blades and cutter arm pivot kits for all net-wrap-equipped 9YG-series models are stocked at the Dallas, TX depot for 3-day delivery to any US or Canadian address.
Net Wrap Coming Loose on the Bale — Layer Count and Tension Problems
A bale that loses its net wrap during handling — the net slides, bunches at one end, or peels away from the bale surface when the bale is moved with a bale spear — has either insufficient wrap layers or insufficient net tension during application. Both problems are distinct and require different corrections.
Insufficient wrap layers is the more common cause. The layer count controller on the net wrap system counts revolutions of the bale during the wrap cycle and terminates the cycle at the programmed count. If the counter is set to 1.5 layers and the bale density is low — such as on a thin stand of dry grass hay — the net may not develop enough inward tension from the 1.5-layer application to stay taut against the bale surface under the mechanical stress of handling. Increase the layer count setting to 2.0 layers on low-density crops. High-density crops at 2.0 layers are adequately secured; low-density crops may require 2.5 to 3.0 layers to achieve equivalent surface tension. Check the layer count setting in the operator’s menu before attributing loose wrap to a mechanical problem.
Insufficient net tension occurs when the net tension brake — a friction pad or spring that applies back-pressure to the net roll as it unwinds — has worn or been set too loosely. A net that feeds with insufficient tension applies with insufficient stretch, which means the net layers have less inward pressure on the bale surface and are more likely to slip under handling loads. Check the net tension brake adjustment per the operator manual and tighten the brake until the net feeds with noticeably more resistance under hand-pulling test. The correct net tension is when you can hear a slight creaking from the net roll during feed — indicating the roll is providing meaningful resistance rather than free-wheeling.
Net Wrap Tearing in the Chamber — Specification and Routing Issues
Net wrap that tears transversely — across its width — during the wrapping cycle is experiencing a tensile overload at some point in the feed path or the bale contact zone. The tear can occur in the feed path (between the roll and the chamber entry point) or on the bale surface (where the bale rotation creates tension in the applied net layers). Each location indicates a different root cause.
Tear in the feed path — between the net roll and the chamber entry point — typically indicates the net tension brake is set too tight, the feed path has a sharp edge or burr that is cutting the net under tension, or the net width is wider than the baler’s feed path width and the net edges are folding and creating a stress concentration at the fold point. Check the feed path for any sharp edges by running a cloth slowly along the feed path surface — any snag point on the cloth indicates a burr or edge that should be smoothed with a file. Confirm the net roll width matches the baler’s net wrap width specification exactly.
Tear on the bale surface — visible when the net breaks on the bale rather than in the path — indicates either a bale density that exceeds the net tensile strength specification, or a net roll with a manufacturing defect (weak zone in the net structure that creates a consistent tear point). Test with a different roll of net from a different lot to eliminate the manufacturing defect cause. If the second roll also tears at the same point in the wrap cycle, the bale density is exceeding the net tensile rating — use a heavier-duty net wrap specification or reduce the bale density setting. All net wrap specifications and replacement parts for net-wrap-equipped 9YG-series round balers are available from the Dallas, TX parts depot.
Net Wrap System Preventive Maintenance Schedule
Most net wrap problems are preventable through the three-point maintenance routine that addresses the three most commonly neglected net wrap system components: the cutter blade, the feed path, and the tension brake.
Pre-Season — Cutter Blade Replacement
Replace the cutter blade every season regardless of observed cutting problems. A season-old blade that appears sharp may have developed micro-fractures or edge rounding that only becomes apparent under the stress of the first production session. The cutter blade costs $15 to $35 and replaces in under 5 minutes — the lowest-cost insurance against a mid-session cutter failure available for any net wrap system component.
Every 20 Hours — Feed Path Inspection
Run a cloth slowly through the complete net feed path — from the roll holder through all guides to the chamber entry point. Any snag that catches the cloth indicates a burr, edge chip, or debris accumulation that will tear the net under operating tension. Clear any debris with compressed air. Smooth any metal burr or edge chip with a fine file. This 3-minute inspection prevents the majority of feed-path tearing problems.
Every Roll Change — Tension Brake Check
Each time a new net roll is installed, verify the tension brake adjustment produces the correct resistance to manual pull-through. The correct feel is meaningful resistance — the roll should not free-wheel when pulled by hand. The tension brake pad wears gradually and loses its friction coefficient — on high-volume operations producing 200+ bales per roll, the brake pad may need adjustment every 2 to 3 rolls to maintain correct tension. Replace the brake pad when adjustment has reached the end of its adjustment range.
All net wrap system components — cutter blades, tension brake pads, feed roller drive kits, cutter arm pivot assemblies, and net wrap rolls in the correct specification — are stocked at the America Ever-Power Dallas, TX parts depot for 3-day delivery to any US or Canadian address. Carrying one spare cutter blade and a net roll of the correct specification in the tractor cab during baling sessions eliminates the two most common net wrap downtime events — a dulled cutter that produces bale tails and a net roll that runs out unexpectedly mid-session — without any special diagnostic effort in the field. For drive gearbox support and any other mechanical component for the full 9YG-series round baler lineup, the same Dallas depot provides the same 3-day parts delivery commitment year-round.
Net Wrap Problem That Is Not on This List?
Describe the symptom — what the bale looks like when ejected, at what point in the cycle the problem occurs, and whether it is every bale or intermittent. We will identify the root cause and ship the correct parts from Dallas, TX within 3 days to any US or Canadian address.
Editor: Cxm